Showing posts with label Stamping 101. Show all posts

Monday, 4 February 2013

Stamping 101: Basic Tools-Your Paper Trimmer

When it comes to basic tools for card making and scrapbooking, your very first purchase hands down should be a quality paper trimmer. There is nothing more useful to the paper crafter than being able to cut clean, straight lines at precise measurements.
There are three basic styles of trimmers out there.
guillotine trimmer
A guillotine-style trimmer has an arm with a blade along it’s length that chops your paper in one long cut. These trimmers are good if you’re cutting large amounts or thick amounts of paper, as the blades are usually self sharpening.
rotary trimmer
A rotary-style trimmer has a circular blade that is covered with a protective casing and rolls along a guide bar. If you like decorative edges, this is a style worth considering because you can purchase all sorts of decorative blades and the cutting is much cleaner compared to decorative edged scissors.

A slicer-style trimmer has a small, replaceable blade that slides down a track to cut your paper. This style is very portable (perfect for on-the-go crafters) and allows you to stop and start your cut anywhere along the paper, so you can cut slits, windows and frames without resorting to scissors. It is also the easiest style to use if you need precise, accurate measurements, in my opinion.
bra
I  think choosing a paper trimmer is a lot like buying a bra. You have to try a lot of different kinds before you find one you like and that feels comfortable! Just like a bra you have to wear everyday, you will use your paper trimmer every time you craft, so don’t be afraid to spend a little more money and get one you truly love.
If you hate shopping for bras, then my ultimate recommendation is the brand new paper trimmer from Stampin’ Up! and please believe me when I profess that I am not just saying that because I sell their stuff! In the past ten years, I’ve bought nine different trimmers and this one truly is head and shoulders above the rest for many reasons. Here’s a few:
  • The trimmer’s base is wide enough that I can measure out a standard card base (5 1/2 x 4 1/4)  without swinging out an extension arm or having the paper go over the edge of the trimmer, yet it is small enough to be portable.
  • The measuring grid extends to the right side of the trimmer up to 1 1/4”, which is super handy for cutting thin strips.
  • I can keep my scoring and trimming blades on at the same time. The track has been made long enough to slide the extra blade out of the way.
  • It feels great. The base is sturdy and doesn’t slide around when I’m trimming. There’s a nice place on the track to stick your hand and help hold the paper in place. The blades themselves have a comfortable grip and don’t wobble or stick when you slide them.
  • There’s a clever storage compartment in the base for extra blades and other doo-dads, so you never have to tear apart your stamp room looking for that fresh pack of blades you knew you had. Not that I’ve ever done that. *ahem*
Here’s a video that shows the trimmer in detail if you still don’t believe me. Good luck finding the best trimmer for you!

Thursday, 11 October 2012

Stamping 101: Basic Supplies- Your Stamping Toolkit

Welcome back to Stamping 101. In previous posts I’ve already discussed the 3 main things you need to get stamping: stamps, ink, and paper. (That’s “SIP” to you acronym lovers out there!) Now we’re down to the must-have tool basics, better known as the Stamping Toolkit.

Why do I call it a “Stamping Toolkit”? In my stamp room, I keep all my most-used tools in a small basket beside me as I stamp, just like a handyman’s toolbox. This way, if I want to leave my stamp room and hang with the family upstairs, I just grab whatever I’m working on along with my basket and I have everything I need for an evening of stamping in front of the TV. It also keeps me from “losing” my adhesive or scissors under the piles of cardstock, inks, and other doo-dads that seem to instantly coat my desk the second I start a project. I’ve trained myself to pick up the adhesive from the basket, use it, and drop it right back into the basket. Saves me a ton of frustration.

If you’re just starting out, please don’t let this list intimidate you. I’ve slowly added to my tool stash over the years and this is what I work with now. If you are just starting out, all you need in addition to your “SIP” (remember: Stamps, Ink, Paper)  is some scissors and adhesive. Really. All the rest of it just makes things easier, or gives us additional options as artists. I could get a little on a soap box here and say that I think the paper crafting world is getting flooded with so many options that if we’re not careful, all those options can paralyze our creativity…but I think that’s for another blog post!

The other thing you might notice about my list is that I don’t have everything in it. There are some adhesives or cutting tools I only use occasionally that stay in my crafting drawers. I only pull those out if I need them. The whole purpose of my toolkit is to keep it simple and pared down to just the basics of what I need. That way, I can put my hands on exactly what I need quickly, rather than dig through a stash of rarely used tools just to grab my scissors.

OK, so without further rambling here’s what’s in my stamping toolkit:

Adhesives

SNAIL Adhesive- If you have to pick only one adhesive, this is it. I use it for sticking pretty much everything that’s paper on my cards, and even for tacking ribbon into place.

SNAIL Refill- Always keep a refill for your SNAIL dispenser handy. There’s nothing worse than running out in the middle of a project. (Just ask my Whiskers Stamp Club!)

Stampin’ Dimensionals- These double-sided foam dots add depth and dimension to the layers on your cards.

Glue Dots- Perfect for securing ribbon, bows, and buttons.

Multipurpose Liquid Glue- I use this when I want a really strong bond, a very precise application of glue, to add a touch of glitter, or when I need to have a bit of “play” in my adhesive to slip layers together.

Sticky Strip- Holds my 3D projects together really, really well. Impossible to remove without ripping, actually. :-)

Cutting Tools

Paper Snips- Again, if you have to pick only one pair of scissors, this is it. Super-sharp and cuts right to the tiny tip. Perfect for all your fine trimming. Love that safety cover. These scissors also work great as a positioning tool for placing tiny rhinestones and pearls.

Craft and Paper Scissors- I wish I had invested in these high quality scissors sooner. They cut like a dream. I’ve tied a scrap of ribbon on the handle to remind me to use them only for fabric and ribbon.

Stampin’ Trimmer- Used whenever I need to cut a straight line. Period. If I was stranded on a desert island, I think I would even choose this over paper snips. Truly.


Other

Bone Folder- Use to score and fold paper. Also helps smooth down large glued areas. Try it. One of those tools you think you don’t really need and then wonder how you ever did without it.

Paper-Piercing Tool and Mat- Called lovingly by me as the “pokey tool” I use this thing for way more than poking holes in my paper. I use it to position little bits of paper or embellishments, to pick off the backing liner of adhesives, to carefully remove something glued incorrectly, for prying brad fasteners apart, the list goes on and on.


Sanding Block- I keep this on hand to buff off the little cardstock “fuzzies” you sometimes get on the edges of your cardstock when it’s time to replace your paper trimmer blade. The fact that this is always in my toolkit goes to show I don’t replace my trimmer blades as often as I should! I also use the sanding block just a little to “rough up” my new stamp sets. A quick scrub across the rubber allows the ink to adhere better. If you like the vintage look, this tool will be invaluable for “distressing” your paper.

Stampin’ Scrub and Stampin’ Mist- To keep my stamps squeaky clean. I also keep a small, lint free cloth to clean my acrylic blocks when they get too fingerprinty.


Pencil and Post-its- Used to jot down measurements, other ideas to try that often spring up in my brain as I’m working, to sketch out card or scrapbook layouts, and to write down things I need for my next order. The temporary adhesive on post-its also make them awesome for punch templates, sponging and masking, and holding your cardstock steady when you zip it through the Big Shot.

Ruler- Just in case I need to measure something when I’m not stamping on my grid paper or have my paper trimmer nearby. I highly recommend the grid paper by the way, it protects your work surface, helps you keep your card layers straight, and has rulers for keeping your measurements accurate.

Black Marker and White Gel Pen- For adding that last touch of detail to a card, or for writing a message on the inside if I need to send it right away!

Small pack of baby wipes- For cleaning inky hands, adhesive gummed scissors, glitter accidents, and edges of stamps when I’ve been overzealous with the ink pad. Can also save your carpet when your kid comes into the room and knocks your stamp pad face down on the floor. (Ask me how I know!)

So there you have it. The contents of my little red basket. Everyone’s toolkit will vary depending on how they work and the kinds of tools they tend to use. I hope that by sharing my toolkit, it will help you build yours. Return your tools to it faithfully once they have been used and enjoy stamping with everything you need at your fingertips!

Next week I’ll be continuing on with some beginner articles, focusing on how to use some of the above tools I’ve talked about. Until then, keep your whiskers clean!


Smiles,

Pam

Wednesday, 26 September 2012

Stamping 101: Basic Supplies-Paper

So you’re looking at the title of this week’s post and wondering to yourself, Can she really write a whole article about paper? How boring!
Not true! In fact, ask any paper crafter and you will discover we are just as fanatic about paper as knitters are for yarn or quilters are for fabric. She who dies with the largest paper stash wins!
To be serious for a moment, without paper all the cool stamps and ink would be for naught. Choosing the right paper for your project makes all the difference in the world as to how good that project turns out.
su-cardstock
Selecting the right paper for stamping is easy if you follow a few simple guidelines. First, you want a smooth paper to stamp on. This is one of the reasons Stampin’ Up!’s Whisper White cardstock is a best seller. Its super-smooth surface makes stamping crisp, clear images a cinch. Experiment with a few different brands and find your favourite. Textured cardstock is great for layering in your projects, but I wouldn’t stamp on it unless you’re deliberately going for a grainy image.
The second thing to look for is the weight of your paper. In linens, you look for thread count. In the paper world, the greater the paper weight, the heavier, thicker, and sturdier the paper is. Paper weight is measured in pounds. Paper weight ranges from 15 lbs. (computer paper) to 125 lbs. (high–quality photo paper) and up. Cardstock weight is around 80 lbs. and is typically what stampers use to create cards and 3D projects like boxes. Patterned scrapbook paper (like SU’s Designer Series Paper) is lighter weight and better for layering with cardstock.
Next, you will want to know how absorbent your paper is. Some cardstocks have additives or coatings that will effect how your stamping ink reacts with your paper. Once again, experiment with different brands to discover your preferences. Tilt your paper in bright light. If you see some shine, you’ll get a nice, crisp image, but give yourself a little extra drying time. Very porous papers (like handmade or mulberry paper) are difficult to stamp on as the ink tends to bleed and feather when it contacts the paper.
The size of paper you choose is personal preference. Scrapbookers tend to favour 12x12 just so they have more paper to work with on their projects. If you just want to make cards, you may like the new 6x6 or 8x8 patterned paper pads that are available now. Most stampers will use 8 1/2x11 cardstock for the base of their cards, as one sheet cut in half yields 2 standard sized cards (4 1/4 x 5 1/2).
Finally, you may want to consider the acidity of your paper. Usually, this this just a concern for scrapbookers worried about the archival quality of their work. I have stamped wedding invitations however, where the couple wanted to be sure their cards and programs would reasonably stand the test of time. Be sure to purchase paper labelled “archival” or “acid free” if you desire this quality.
Now, I could go on for a very long time about all the different sorts of specialty papers there are out there. Glossy, glitter, flocked, transparent, the list goes on and on. In fact, I got into stamping and scrapbooking in a roundabout way. Originally, I was into making handmade paper and books. Did I mention I love paper?
The truth is from here on in, it’s just a whole fun world of possibilities. I’m not going to take that away from you. I love experimenting with different paper! Buy the colours, textures, or patterns that speak to you and go have fun!
So much Paper T-Shirt
Stay tuned for the next Stamping 101 where I discuss what should be in your basic tool kit. Until then, keep your whiskers clean!

Smiles,
Pam

Thursday, 20 September 2012

Stamping 101: Basic Supplies: Inks and Stamp Pads

Welcome to the second instalment of my Stamping 101 Series. Today we’ll be going over the huge (and sometimes confusing!) variety of inks available to stampers.

With the explosion of growth in the paper crafting industry (due largely to the popularity of scrapbooking) there have been hundreds of new ink formulations to flood the market. I’m going to keep this article very basic and if you want to learn even more, I’ll have a few resources for you at the end.

To start, let’s talk about the pad itself for a few moments. Look for a case design that features a raised surface ink pad. You will likely want to ink a stamp sized larger than the case, and you don’t want the plastic getting in the way. If you’re the kind of stamper like I am, losing their supplies amongst the piles on her desk, you may prefer a hinged lid that stays attached to the case, rather than one that lifts off completely. Some cases are made to store the pads upside down so that the ink will run close to the top of the pad when you’re ready to ink. Double check with the manufacturer before flipping all your cases however, as some juicier inks may pool in the lid. The pad itself may be made from felt, sponge or firm foam. All vary in feel and in the coverage they provide. Experiment to discover what you like.

Stamp Pad

Should you purchase a full sized stamp pad or the little “mini” ones available? I personally prefer a full sized pad, as it makes inking quick and easy. The mini ones are great for portability if you head out to stamp, and for inexpensively sampling new colours or formulations of ink. Keep in mind that the mini pads will need to be reinked very frequently and take a longer time to ink large stamps.
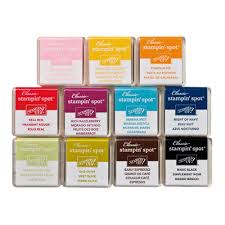
That brings me to the subject of reinkers. These little squeeze bottles are usually available for purchase with your stamp pads. When your ink pads begin inking lightly or unevenly, a few drops of reinker will refresh the pad, allowing you to use them for years without replacement. I strongly encourage you to purchase the reinker immediately along with your pad. There is nothing more frustrating than needing to reink a pad only to discover that style or colour has been discontinued.


Now onto the ink! Stamping ink can be broadly divided into 3 main types; dye-based ink, pigment-based ink, and specialty ink. Let’s look at the characteristics of each.

Dye-Based Ink

This style of ink works by sinking in to the paper it is stamped on, in fact “dying” the actual fibres of the paper. They dry quickly and are the most common and inexpensive inks to purchase. These inks are usually water-based, which means they run or bleed if they get wet. Many stampers use this quality to their advantage, using this ink in place of watercolour paint or by misting their projects with water to create a deliberately mottled effect.

Dye ink is usually somewhat translucent. You will need to experiment and see what colour of paper and ink work best together. Generally, lighter coloured ink will not show up well on darker coloured paper.

There are two common stamping techniques that I would not use this ink for. Due to its fast-drying nature, this is not a good ink for embossing. The ink will simply dry too fast for your powder to stick. I would also avoid it with outline-style stamps you plan to color in with watercolours. Your outline will smear when it gets wet. It would be OK for a dry colouring medium like pencil crayons or chalks. 

 Pigment-Based Ink

This ink works by sitting on top of the paper it is stamped on. There is no “dye” to the colour, rather the colour comes from pigment particles that are suspended in a clear medium (like glycerine). This makes for a much more opaque, vibrant colour that will show up on any colour paper it is stamped on, even white on black. It resists fading and will not run, making it a perfect choice for scrapbookers who are worried about the safety of their albums. This ink dries much slower, and many stampers will keep a heat gun handy when stamping with pigment ink just to speed up the drying process. This slow drying is perfect for embossing techniques, as well as direct-to-paper techniques where you smear and blend the ink straight from the stamp pad on to your paper.

This ink is usually more expensive than dye ink. It is thicker too, which means you will use up more ink each time you stamp, making it necessary to reink the pad more often. It will also take a bit more effort to clean your stamps after using pigment ink. If you are the type that stamps only occasionally, you will discover these pads can dry up or harden quite quickly.

This is not the ink to use on glossy paper or things like plastic or ceramic. It simply will never dry!  

Specialty Inks

Like the name implies, there are a myriad of formulations out there for just about any stamping need. Do a little internet research (or call me!) before purchasing. You will discover many of the inks can be used for more than one purpose, saving you money and storage space.

Fabric Inks- These inks are made specifically to stamp on fabric, and other surfaces that need a permanent touch. Heat is usually used to set the ink.

Permanent Inks- Usually meant for tile, wood, glass and plastic. The ingredients are usually quite strong (solvent based) and should be used in a well ventilated area.

Watermark Ink- This ink creates a color slightly darker than the paper stamped on. Very effective on lighter paper, makes lovely, subtle backgrounds. Can also be used as a resist pad or as an embossing pad (see below).

Embossing Inks- These inks are clear or slightly tinted and quite sticky. They are designed to be slow drying so that embossing powder can adhere to the stamped image.

Embossing Pens- Markers that have tinted embossing ink in them, so you can emboss handwriting or any type of drawing. They come in a variety of styles.

Resist Pad- This is a fun thing to try if you are layering inks. Nothing will stick to an image stamped in resist ink, so you can have a bottom layer color show through a top one. You can achieve a similar effect with clear embossing powder too.

Chalk Inks- A new style of ink that is similar in formulation to a pigment ink, but when dry leaves a lovely chalk-like colour. Wonderfully subtle and very blendable.

Rainbow Stamp Pads- Can come in pigment or dye ink. With dye ink, the colors will run together, pigment ink will stay separate. Very fun for multi-coloured images.They come in a variety of color combinations, and are a great way to acquire several colors at once.

Washable Ink- Stamp pads made with children in mind! While some colours may not wash out of furniture or carpets, they are pretty good at coming off your kids and their clothes. I get my kids to ink their stamps with washable Crayola markers. Works great!

Hybrid Inks- As mentioned earlier, there are new ink formulations being released all the time. Many are an attempt to merge the qualities of dye and pigment inks together, claiming things like quick drying but with pigment-like coverage. You may want to ask other stampers if they’ve liked a particular brand before trying yourself.

Glue Pads- Not actual ink, but allows you to stamp your image in glue. Perfect for adding glitter or flocking. Some brands require you to heat set the glue, others just air dry.

Finally, as a Stampin’ Up! Demonstrator, I feel I should clarify the inks Stampin Up! carries. Our Classic Stampin’ Pads, avaliable in all colours, are a dye-based ink. This ink also comes in the small sized Stampin’ Spots and in a dual-tipped marker form. We also carry Craft Stampin’ Pads in black or white. These are essentially pigment ink, but have the additional quality of being permanent when heat set for use on wood and fabrics. For specialty inks there is the Versamark watermark pad and StazOn permanent ink in black and white.

Whew! Hope that helps clear up at least a little confusion in the ink world. Comments and emails are very welcome. If you want to read about inks even more, check out the article here: ttp://www.monkeyhousehobby.com/guides/inkguide/

Next time, I’ll have a short little article on paper. Until then, keep your whiskers clean!

Smiles,

Pam

Thursday, 13 September 2012

Stamping 101: Basic Supplies-Rubber Stamps

Welcome to the first installment of my Stamping 101 Series. For the next few posts, I’ll be discussing the very basic supplies you need to create cards, scrapbooks, and other projects using rubber stamps.
The most obvious thing you will need to begin is…well...a rubber stamp! There are many different styles, and it’s good to know the pros and cons of each. Not all stamp styles will work in all situations. Let’s start by looking at the parts that make up a rubber stamp.
Most stamps have three distinct parts. The die is the rubber design. In this photo, you can see that the images are not raised very high from the background rubber. Poorly etched die
Ideally, you should look for a die that is deeply etched for the clearest prints. This stamp below is an excellent example of good etching. You can also see the background rubber has also been trimmed very close to the image to prevent “backprints.” Backprints are those annoying smudges of ink you get on your project when you’ve over inked a stamp (or pressed too hard) and you stamp the background edge along with the image. Deeply etched die
The second part of a stamp is called the cushion. It is the padding between the die and what it’s mounted to, usually made out of foam. A thick cushion will help even the pressure placed on the stamp for a clear image and elevates the die so the mount does not leave a mark behind on your project. Generally the thicker the foam, the easier it is to stamp a nice, even image. The cushion is the grey part in these next two photos.
  Foam cushion sample 1
 Foam cushion sample 2

The last part of a rubber stamp is called the block or mount. It is the handle to which the die and cushion are mounted to. Blocks are necessary to apply firm, even pressure on the die & cushion, resulting in a smooth, even image. Mounts are commonly made from wood or clear acrylic. Some blocks have finger grips or grids on them to make stamping easier.
Clear block
   Wood block

Now that you know the basic parts of a stamp, let’s briefly discuss some of the different styles of stamps, as well as their pros and cons.
Wooden Stamps- Traditionally, what one pictures when we talk about rubber stamping. Usually the best quality and variety of images. Also the most expensive. The die & cushion are permanently mounted to the wooden block. Can take up a lot of storage space. To stamp images with precision, a stamp positioning tool is necessary, since you cannot see through the wood block. Ink stains difficult to remove if they get on the wood block. Will last a lifetime if properly cared for.
wooden stamp
Foam Stamps- These stamps have the dies set on thick foam which serves as the mount. There is no cushion. Care must be used to not leave backprints. An economical way to build up your stamp collection. Wonderful for kids. Also used in home decor projects because the foam stamps accept acrylic paint well. Considered “throw away” style stamps because they are inexpensive and don’t last very long. Nearly impossible to fully clean because the foam is absorbs the ink.
foam stamps
Acrylic or “jelly” stamps- These stamps are used with clear, acrylic blocks and are made out of a clear jelly-like material which makes them excellent for positioning exactly where you want them.  They are much less expensive than traditional wooden stamps. Stampers purchase a variety of acrylic block sizes to match the stamp sets they purchase. Sets are usually stored on a thin sheet of plastic and placed in a binder, cd case or plastic envelope, making storage very practical. The die is usually deeply etched, but there is no cushion. Last a long time with proper care. The acrylic mounts can be washed in water, but the jelly dies get stained from ink very quickly. (Note that staining does not affect the performance of the stamp, just its look.) Personally, I have a difficult time getting clean, even stamp images with this style of stamp. I miss having the cushion. This style is very popular, however. Close to My Heart and Papertrey Ink are two successful stamp companies to carry this style.
jelly 2
jelly stamps
Roller stamps- The die is a long strip set on a wheel to achieve a continuous pattern. Great for borders. Some roller stamps are self inking. Some companies have interchangeable wheels and inks that you snap into the handle, while others are one unit with the wheel permanently attached to the handle. All-plastic rollers are easy to clean and will last a lifetime with proper care.
roller stamp
Clear-mount cling stamps- Although stampers have been using cling mount foam for years, this style of stamp has exploded in popularity since Stampin’ Up! introduced their version in 2011. The idea is fabulous. The rubber die and the cushion are adhered together just like a wood mount stamp, which allows for the same excellent quality image that a good wood stamp can create. Instead of being permanently stuck to a wooden block however, the opposite side of the cushion is treated with a special “clingy” finish that allows it to adhere to the smooth surface of an acrylic block for stamping. The result is an excellent quality stamp with a mount you can see through for easy positioning. These stamps also cost less than their wooden counterparts and take up considerably less storage space. Some people claim they have difficulty getting their stamps to cling to the blocks, but I’ve found as long as you keep your acrylic blocks clean, there’s no problem. I personally LOVE this style of stamp, and it’s all I really buy now. Lots of stampers (myself included) are now converting their wooden stamp collection to the cling style, since you can purchase the cling foam separately in sheets specifically for this purpose. I’ll write a post about that another time!
Clear mount

Hope that was helpful! Feel free to leave any comments or questions below. In next week’s Stamping 101, I will (hopefully) demystify the world of stamping ink. Until then, happy stamping and keep your whiskers clean!

Smiles,
Pam