
Welcome back to Stamping 101. In previous posts I’ve already discussed the 3 main things you need to get stamping: stamps, ink, and paper. (That’s “SIP” to you acronym lovers out there!) Now we’re down to the must-have tool basics, better known as the Stamping Toolkit.
Why do I call it a “Stamping Toolkit”? In my stamp room, I keep all my most-used tools in a small basket beside me as I stamp, just like a handyman’s toolbox. This way, if I want to leave my stamp room and hang with the family upstairs, I just grab whatever I’m working on along with my basket and I have everything I need for an evening of stamping in front of the TV. It also keeps me from “losing” my adhesive or scissors under the piles of cardstock, inks, and other doo-dads that seem to instantly coat my desk the second I start a project. I’ve trained myself to pick up the adhesive from the basket, use it, and drop it right back into the basket. Saves me a ton of frustration.
If you’re just starting out, please don’t let this list intimidate you. I’ve slowly added to my tool stash over the years and this is what I work with now. If you are just starting out, all you need in addition to your “SIP” (remember: Stamps, Ink, Paper) is some scissors and adhesive. Really. All the rest of it just makes things easier, or gives us additional options as artists. I could get a little on a soap box here and say that I think the paper crafting world is getting flooded with so many options that if we’re not careful, all those options can paralyze our creativity…but I think that’s for another blog post!
The other thing you might notice about my list is that I don’t have everything in it. There are some adhesives or cutting tools I only use occasionally that stay in my crafting drawers. I only pull those out if I need them. The whole purpose of my toolkit is to keep it simple and pared down to just the basics of what I need. That way, I can put my hands on exactly what I need quickly, rather than dig through a stash of rarely used tools just to grab my scissors.
OK, so without further rambling here’s what’s in my stamping toolkit:
Adhesives
SNAIL Adhesive- If you have to pick only one adhesive, this is it. I use it for sticking pretty much everything that’s paper on my cards, and even for tacking ribbon into place.
SNAIL Refill- Always keep a refill for your SNAIL dispenser handy. There’s nothing worse than running out in the middle of a project. (Just ask my Whiskers Stamp Club!)
Stampin’ Dimensionals- These double-sided foam dots add depth and dimension to the layers on your cards.

Glue Dots- Perfect for securing ribbon, bows, and buttons.

Multipurpose Liquid Glue- I use this when I want a really strong bond, a very precise application of glue, to add a touch of glitter, or when I need to have a bit of “play” in my adhesive to slip layers together.

Sticky Strip- Holds my 3D projects together really, really well. Impossible to remove without ripping, actually. :-)

Cutting Tools
Paper Snips- Again, if you have to pick only one pair of scissors, this is it. Super-sharp and cuts right to the tiny tip. Perfect for all your fine trimming. Love that safety cover. These scissors also work great as a positioning tool for placing tiny rhinestones and pearls.

Craft and Paper Scissors- I wish I had invested in these high quality scissors sooner. They cut like a dream. I’ve tied a scrap of ribbon on the handle to remind me to use them only for fabric and ribbon.

Stampin’ Trimmer- Used whenever I need to cut a straight line. Period. If I was stranded on a desert island, I think I would even choose this over paper snips. Truly.

Other
Bone Folder- Use to score and fold paper. Also helps smooth down large glued areas. Try it. One of those tools you think you don’t really need and then wonder how you ever did without it.

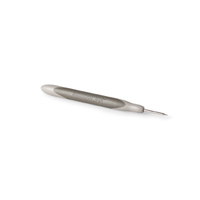
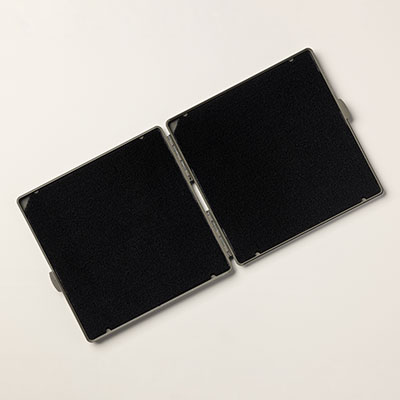
Paper-Piercing Tool and Mat- Called lovingly by me as the “pokey tool” I use this thing for way more than poking holes in my paper. I use it to position little bits of paper or embellishments, to pick off the backing liner of adhesives, to carefully remove something glued incorrectly, for prying brad fasteners apart, the list goes on and on.

Sanding Block- I keep this on hand to buff off the little cardstock “fuzzies” you sometimes get on the edges of your cardstock when it’s time to replace your paper trimmer blade. The fact that this is always in my toolkit goes to show I don’t replace my trimmer blades as often as I should! I also use the sanding block just a little to “rough up” my new stamp sets. A quick scrub across the rubber allows the ink to adhere better. If you like the vintage look, this tool will be invaluable for “distressing” your paper.

Stampin’ Scrub and Stampin’ Mist- To keep my stamps squeaky clean. I also keep a small, lint free cloth to clean my acrylic blocks when they get too fingerprinty.


Pencil and Post-its- Used to jot down measurements, other ideas to try that often spring up in my brain as I’m working, to sketch out card or scrapbook layouts, and to write down things I need for my next order. The temporary adhesive on post-its also make them awesome for punch templates, sponging and masking, and holding your cardstock steady when you zip it through the Big Shot.
Ruler- Just in case I need to measure something when I’m not stamping on my grid paper or have my paper trimmer nearby. I highly recommend the grid paper by the way, it protects your work surface, helps you keep your card layers straight, and has rulers for keeping your measurements accurate.
Black Marker and White Gel Pen- For adding that last touch of detail to a card, or for writing a message on the inside if I need to send it right away!
Small pack of baby wipes- For cleaning inky hands, adhesive gummed scissors, glitter accidents, and edges of stamps when I’ve been overzealous with the ink pad. Can also save your carpet when your kid comes into the room and knocks your stamp pad face down on the floor. (Ask me how I know!)
So there you have it. The contents of my little red basket. Everyone’s toolkit will vary depending on how they work and the kinds of tools they tend to use. I hope that by sharing my toolkit, it will help you build yours. Return your tools to it faithfully once they have been used and enjoy stamping with everything you need at your fingertips!
Next week I’ll be continuing on with some beginner articles, focusing on how to use some of the above tools I’ve talked about. Until then, keep your whiskers clean!
Smiles,
Pam